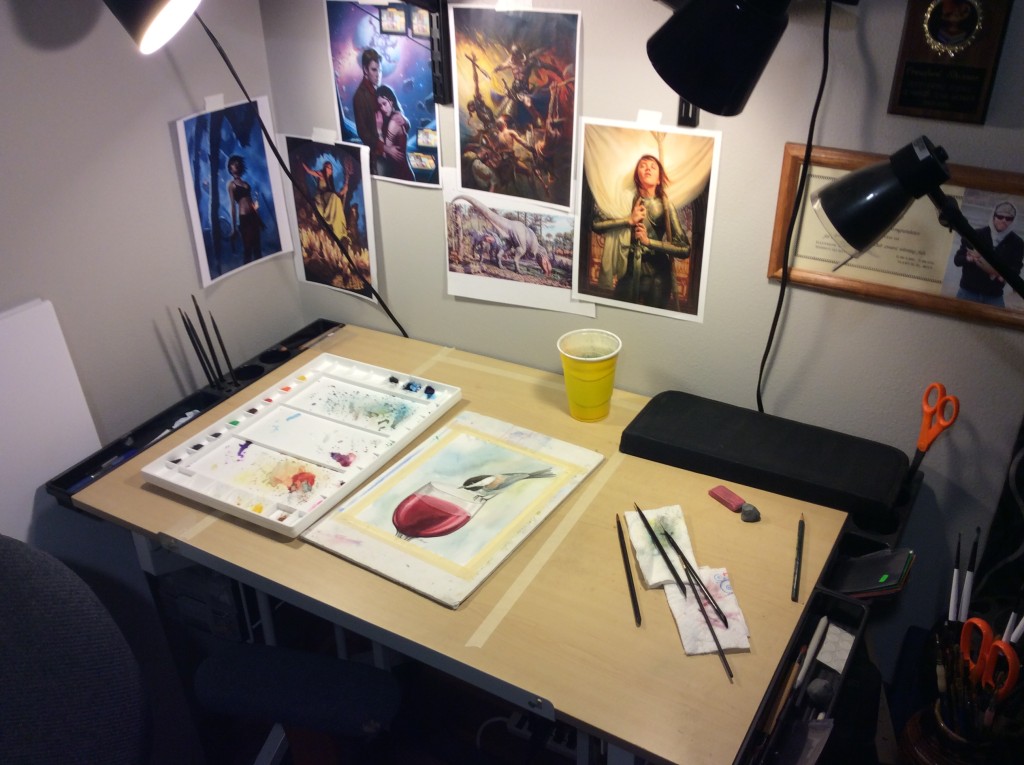
Trying out the Time Lapse

File_000 (1)

So lately I have decided to try out some time lapse videos of me working on either smaller projects or just snippets of me doing things.  I don’t really have an official set up for this yet so for now its just my IPad using the app Hyperlapse but it should get the job done.  I have given this a test run on my new painting of a cute little chickadee drinking from a wine glass!  If you are interested check them out!


Mistcutter Hydra

Alrighty, time for another card alter!  This time its Mistcutter Hydra plus WIPS! woot.  So now you get to see a little bit of how I go about making my alters.

Tylosaurus


Alrtight its finally done!  After quite some time, many sketches, revisions, and edits (ok and procrastination) I have finally finished my painting of the Tylosaurus!  There was alot of learning done in this one.  For starters I have never painted an underwater scene before.  Secondly, how does one go about painting a baitball of fish???  Then there was the tylosaurus!  But i feel that this art piece came out really well.  Here is all the in progress shots to go alont with it!

Finish is 9×10 watercolor on Aquabord, really awesome stuff.  This is the first painting done on that material and I really like it.

Altered Magic the Gathering Cards

Hey guys, so I love the card game Magic the Gathering, and lately I have been getting into doing some alterations on cards.  I have not yet got up the nerve to try my hand on something like my Thassa, God of the Sea yet, but I did just recently do a couple of really cool ones and I thought I would share them with you!

Geralf’s Messenger was probably the easiest to do, but i think it came out to be the best looking of these couple.

Triton Fortune Hunter I think looks really sweet, it was pretty difficult to do and the end result makes the card look way more epic than it really is.

Supreme Verdict is definitely one of the coolest ones I have done, alas i covered the name up so i guess its not tournament legal, but I dont mind, its just for me anyways.

Finally Cloudfin Raptor… Did you guys know there were buildings in the background of this?  I didnt until I got started but overall im pleased with them.  I did two, I actually run four in the deck their from but I though two was enough, on i think the building on the right was done better and the other i like my clouds and waterfall better.  But Im not telling which, you guys can decide for yourself!  Anyways hope to post more soon!

Iron Man

Recently I did a image of the Hulk riding a lion.  That seemed to have started something, and someone asked me to do a picture of Iron Man. So i did.  Anyways, here are a few of the work in progress shots I took, and the finished project.  I feel this one came out pretty good, i got to play around with some lighting effects and i feel im learning more about that effect.  And the air brush really pushed this one up to another level.  I think it really helped the lighting effects.  Mostly watercolor but the airbrush work is acrylic.  Hope you like it!

Iron I Iron II Iron III

Edit Iron man

THE HULK… riding a lion???

Image

Yes my friends, all things are possible if you are the Hulk.  At the request of my very close roommate (oh and fiance) she suggested I should do a painting of The Hulk.  But of course not just any rendition of the Hulk, but he must also be riding a lion… because hes the hulk, he can do what he wants.  So since her birthday was coming up, and all my other plans went down faster than Megatron at the end of Transformers, I decided I would undertake this massive undertaking… with the undertaker? haha ANYWAYS here was my process!

First as will all good drawings you start with a sketch.  Of course i dont have the foresight to actually take a picture of a sketch so we will skip that part.  Then I go hunting, and of course since we are drawing the hulk, I of course use my own body as a reference…

Hulky Reference

Hulky Reference

There, now that you are all satisfied by the hulky ness, we move onto the first real drawing of the art piece, and the finalized sketch that I went with.

1002130844 - Copy

Pretty sweet yeah?  Alright so time to get down to business.  So after this lovely drawing was completed, it was time to start with color.  Luckly the Hulk is green, so its pretty easy to decide on that, but I didn’t quite know what else, so of course I went with purple, because it goes well with green I felt, and then would go well with the Yellowish color i was thinking of doing for the lion.

1003131750 - Copy

So I got really excited while painting the hulk and forgot to take an in-progress… sorry about that.  Anywho here we go on an image spree of the rest of the hulkyness.


1003131905 - Copy10041315231004131557

So I honeslty didnt know what to do for a background.  I was pondering may things, like the African plains, or some New York city street, but then I thought, what could the hulk possibly be doing while riding a lion?  The answer was obviously destroying a harmless brick wall… So I did.

And here is basically how it all came out!

1004131643

Tell me what you think guys!


Pisgah Covered Bridge

Ok so this time I have a post for the WIPS of my painting of the Pisgah Covered Bridge.  When I was younger, my family and I went to many covered bridges.  My mom has a real liking of them and I never passed up a chance to get close to water (yeah im odd).  Anyways one of my favorites that I remember going to was the Pisgah Covered Bridge.  So I decided to paint it and then give it as a present to my mom for her birthday (awesome artist son right!?).  So here goes the creative process of this work.

First I worked from a picture my mom took long ago.  I unfortunately don’t have a digital version of that picture, but you can google to find some images of the bridge.  I started off with a real nice, light, and detailed line drawing of the bridge. I then started right away with the wood work on the bridge.

Bridge 1

I used a combination of Prussian Blue and Chinese Orange watercolors to achieve the nice aged wood look.  It is all about layers in my work.  I start with the dark layers, putting a light base where they will be.  Then I put more layers on them and the next darkest areas.  I keep laying washes of blues and oranges to get the colors just right and add that bit of randomness that is in the old wood.

I then started on the water.

Bridge 2

Normally the bridge didn’t have this much water under it, but hey this is my painting so I did what I wanted.  Once again all about slow adding of layers to build up value and color.

Bridge 3

Started adding grass.  I would end up constantly adding more and more texture and layers to the grass throughout the entire painting process.

Bridge 4

Added the roof and tress.  I removed a lot of the unsightly marks of time from the bridge, but left the natural effects of time.  I heard the bridge used to be red but I have always known it as this so I kept with its true color, just minus the graffiti.

Bridge 5

Ok now we are getting somewhere!  first wash of trees put in and the rest of the river.  Unfortunately this is a turning point in the painting.  I really liked it at this point, but since the very beginning I had planned on putting leaves in the foreground of the painting with acrylic paint.  This gave me a lot of trouble as I was not as experienced at this.  I had a really hard time, and ended up have to do some serious fixing on the piece because I put too much to fast and almost covered up the bridge!  Luckily I did manage to fix it but I still feel it isn’t quite as good as it was before the foreground leaves.

Bridge 6

The more finished picture coming soon!